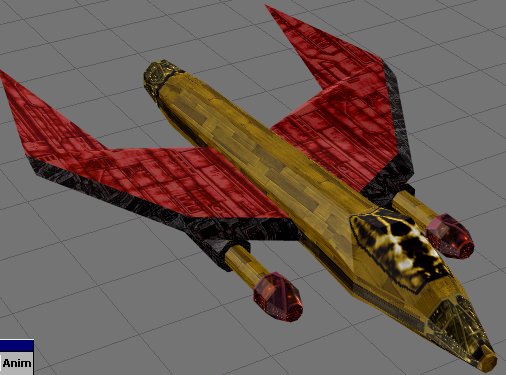
So, this is pretty much what the model looks like when its done being textured. Your results may vary. Now, we have to perform a few last steps to prepare it for conversion into a Freespace 2 ship.
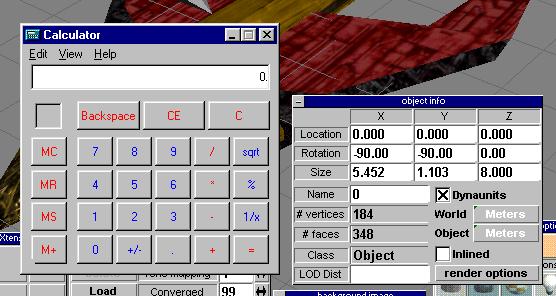
Since the model is oriented the right way already, facing left, we need to now scale it. Its easy to do this when your model is just made out of one piece. Its more tricky with subobjects attached, like turrets. However its best to save the scaling for last for fighters and other small ships because TrueSpace will only zoom in so far. What we first want to do is go to the object units box and change it to meters. One meter in Truespace is 20 meters in Freespace 2. I think. Or if its not, I'll change this. :) Anyway, we can see that when our object got sized the largest side got sized to 8 meters. This is normal. So, we need to decide on a size. FS2 fighters are from about 25-35 meters long, and I think an Ursa bomber is 54. So, I usually size my fighters on the longest side around 1.2 meters. So thats... er... 24 meters in FS2. Yeah, so, we use the calculator here. We need to see what to divide the other numbers by to get the correct scale. So, 8 divided by 1.2 is...the EVIL number 6.66. So, we need to change the long dimension to 1.2 (what we want) and scale the other two by dividing them by 6.66.

Sooo... that comes out to these dimensions you see here. And you can see that the ship is now really tiny. Well, relatively speaking. Now that we've scaled the object, we need to save it. You can save it as the same object, or a different one. I'll go ahead and do a Save As, but also save a scene, just in case. Oh yeah, make sure your object is centered on 0,0,0... which it should be unless you accidentally moved it.
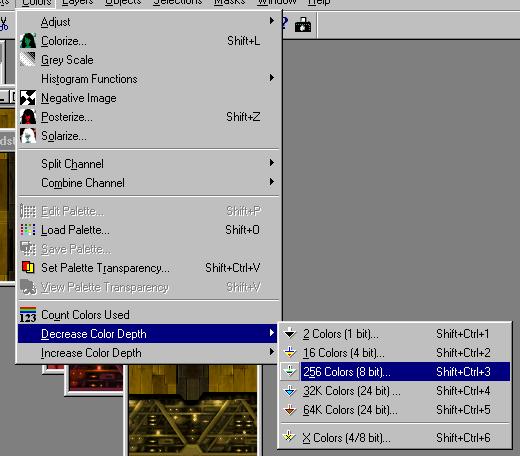
Alright. Now we need to go back to PSP and get our textures ready for FS2. We have to open them all up and reduce their color depth to 256. Usually there is almost no noticeable difference for the texture. Then save all of the files after reducing the color.
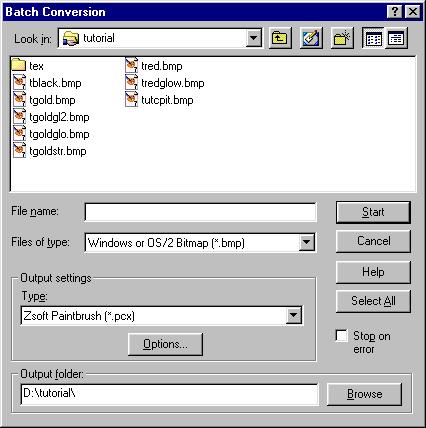
Next we go to the file menu and select Batch Conversion. We will convert from BMP to PCX. As you can see my BMP textures are the only BMPs in this directory. So, I can hit the select all button to begin conversion. Otherwise you can multi-select the files you want to convert with the window. Once you hit Select All, or Start, it begins and converts. Since you reduced the colors they will become 256 color PCXs. (The BMPs will remain on file also.)